word-02
พิมพ์จ่าหน้าซองด้วย Word

Printing envelope with Microsoft Word.

Printing envelope addresses using Microsoft Word is a simple and convenient way to create a professional look for your mail. Whether you're sending a business letter or a personal note, Microsoft Word offers tools that allow you to quickly design and print envelope addresses. In this article, Thai Envelope will guide you through the simple steps of printing envelope addresses with Word, from setting the envelope size to printing the final product.


How to Print Envelopes in Word

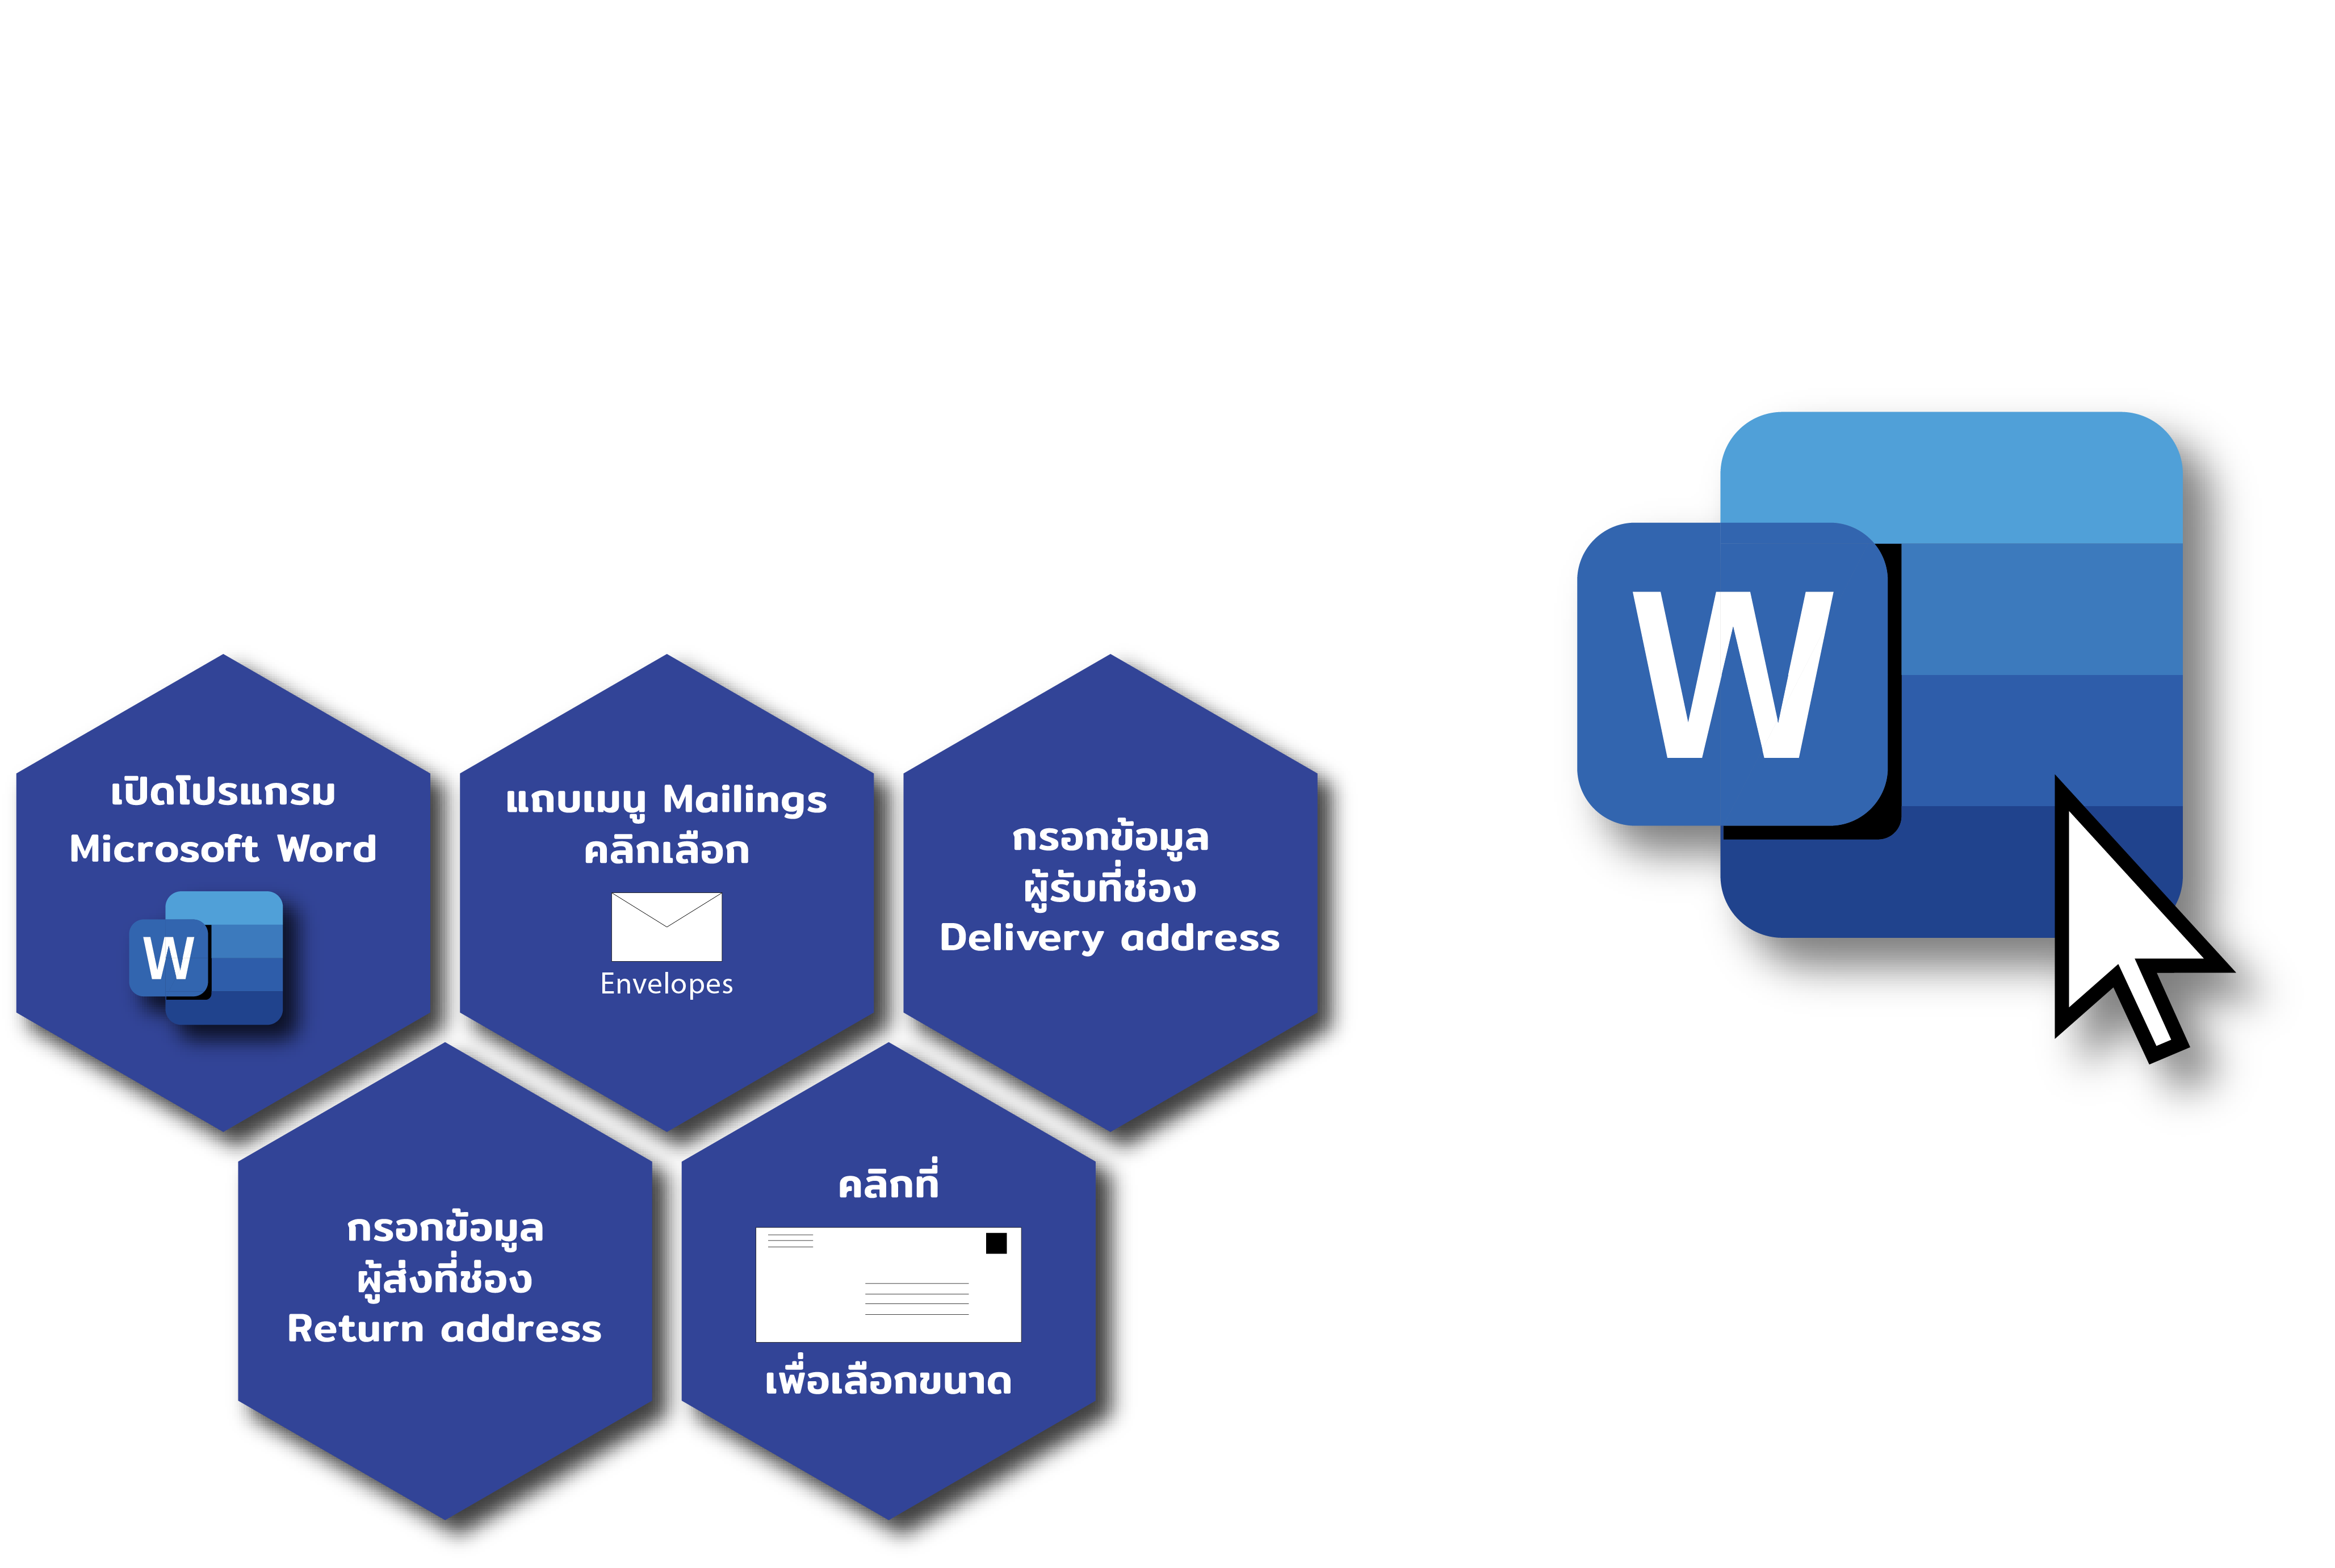
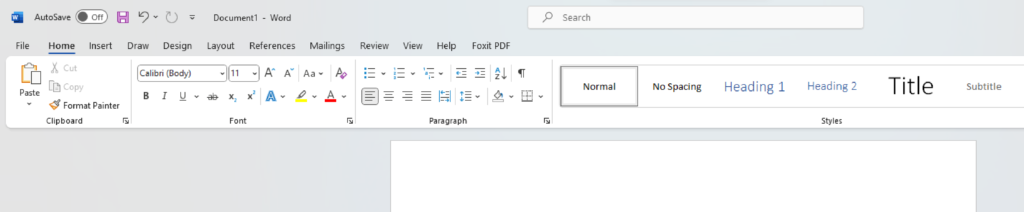
1. Open Microsoft Word.

พิมพ์จ่าหน้าซองด้วย Word

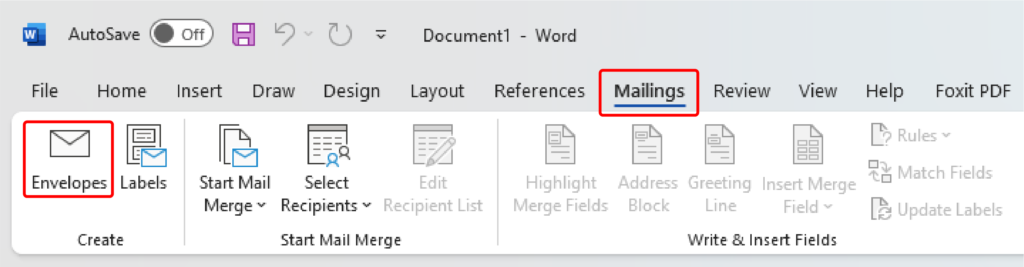
2. Go to the Mailings menu tab and select the envelope icon.

พิมพ์จ่าหน้าซองด้วย Word

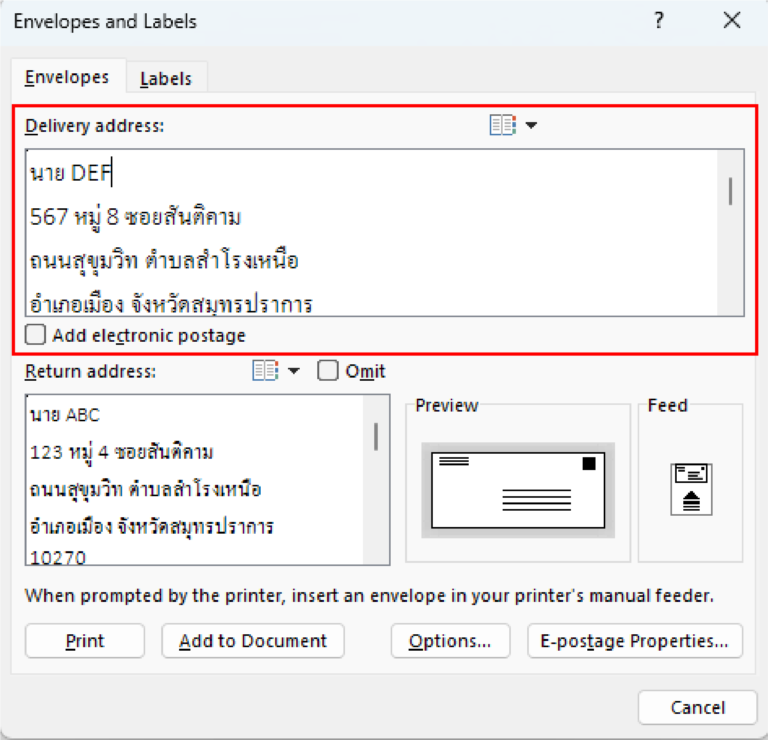
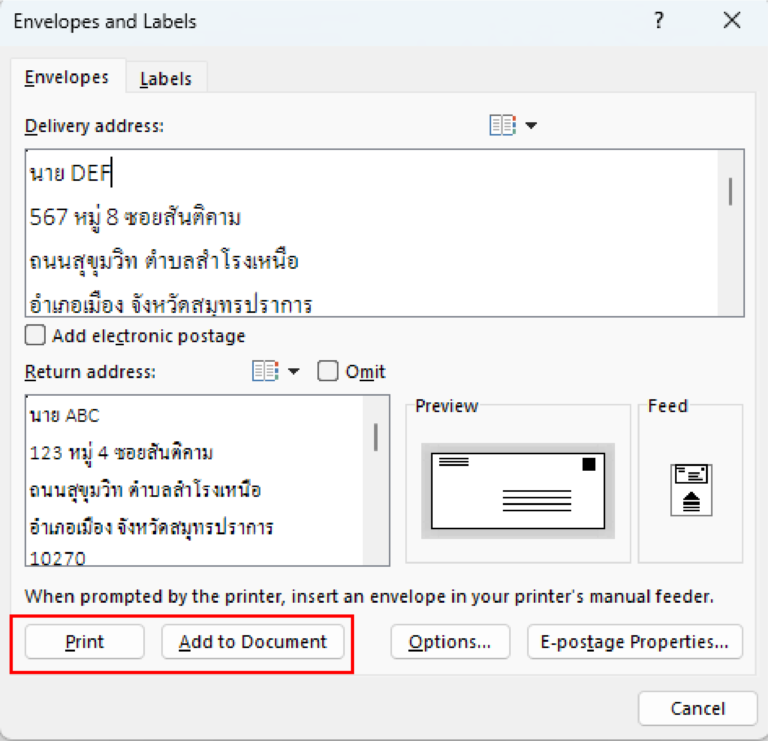
3. See the window below and enter recipient's info in 'Delivery Address' box.

พิมพ์จ่าหน้าซองด้วย Word

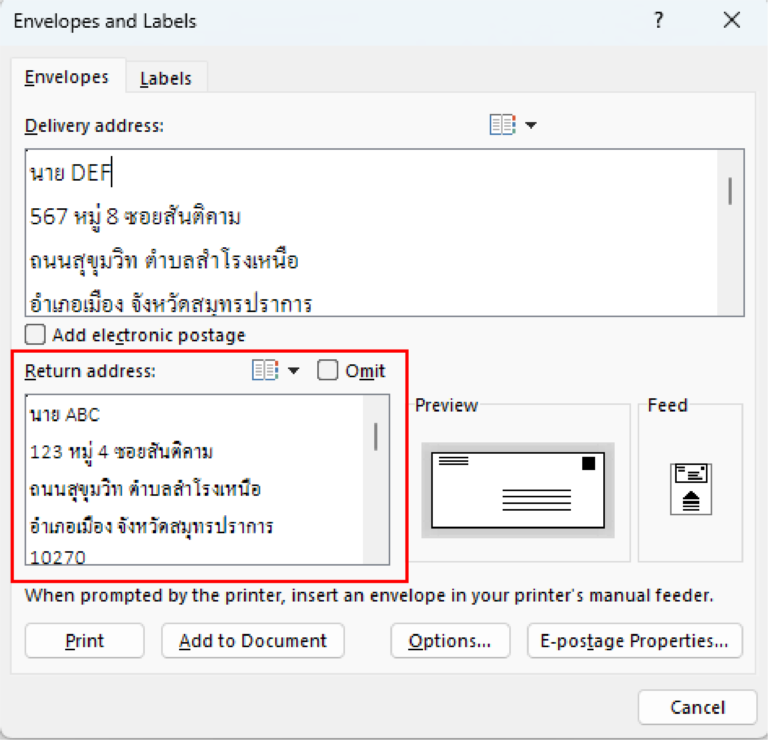
4. Correctly fill in sender's info for undeliverable Letters.

พิมพ์จ่าหน้าซองด้วย Word

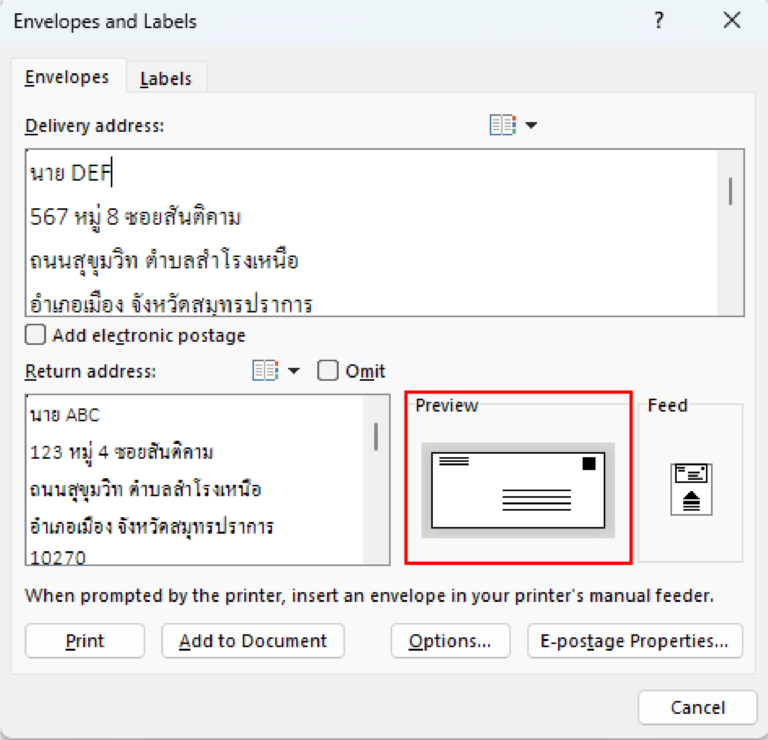
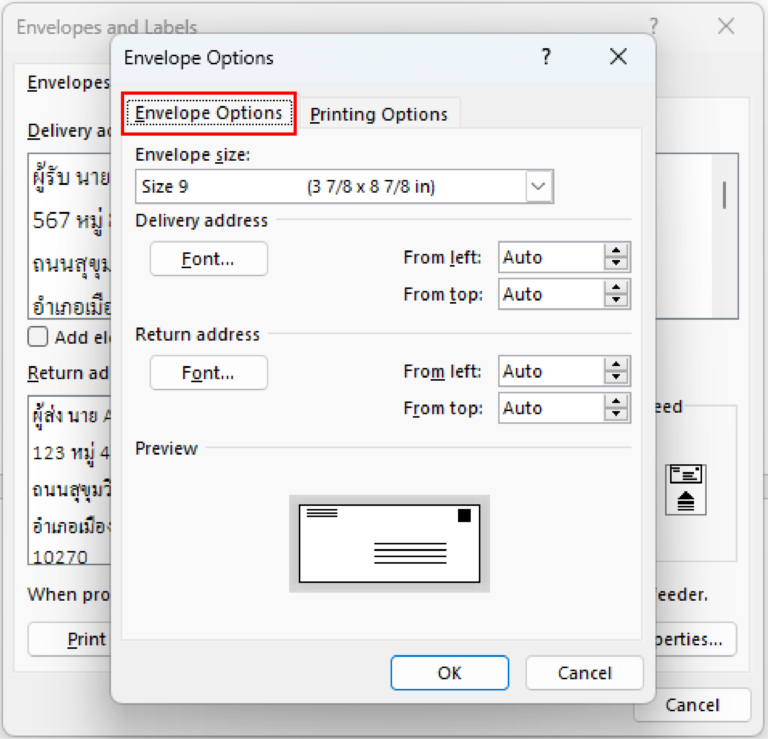
5. Click on the envelope icon to adjust various sizes on the envelope.

พิมพ์จ่าหน้าซองด้วย Word

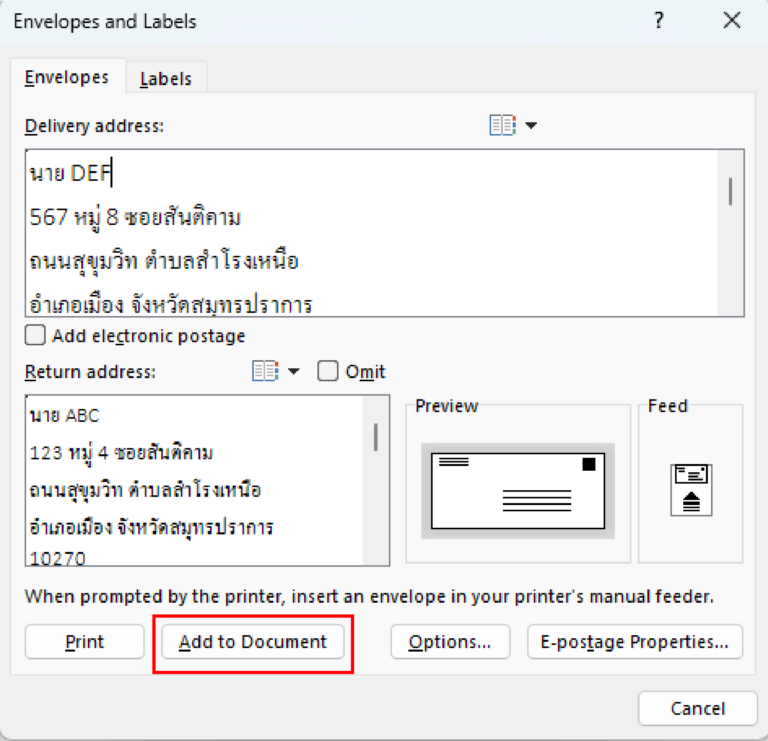
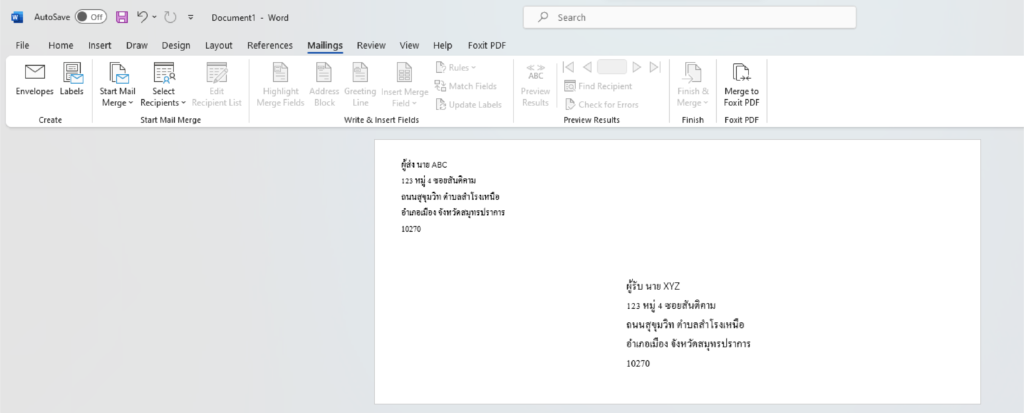
6. After clicking 'Add to Document' you'll have a print-ready envelope page.

พิมพ์จ่าหน้าซองด้วย Word

Printing Option

1. Click on the envelope icon or the 'Options' button to enter the settings window.

พิมพ์จ่าหน้าซองด้วย Word

2. In the window shown below, adjust envelope size and margins.

พิมพ์จ่าหน้าซองด้วย Word

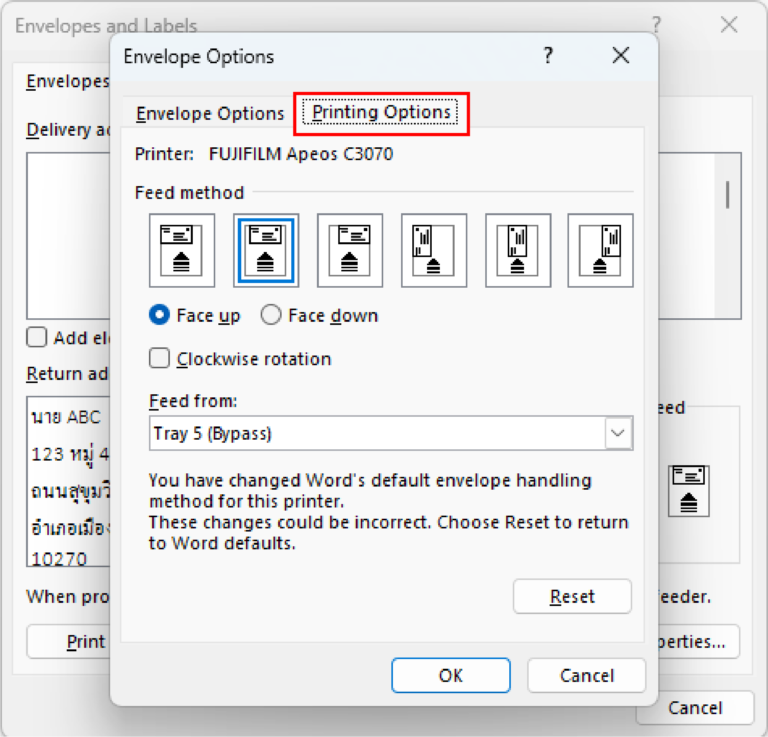
3. Go to 'Printing Options' to set preferences, then click 'OK'.

พิมพ์จ่าหน้าซองด้วย Word

4. Click 'Print' for immediate printing or 'Add to Document' to preview.

พิมพ์จ่าหน้าซองด้วย Word

Example of clicking the 'Add to Document' button.

พิมพ์จ่าหน้าซองด้วย Word